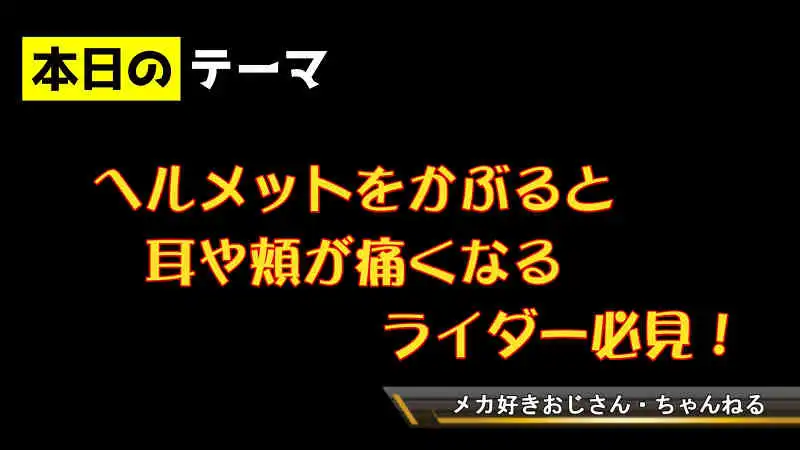
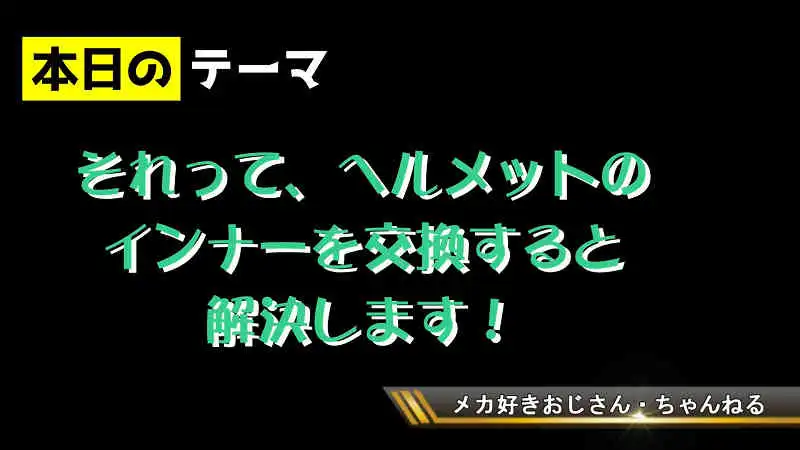
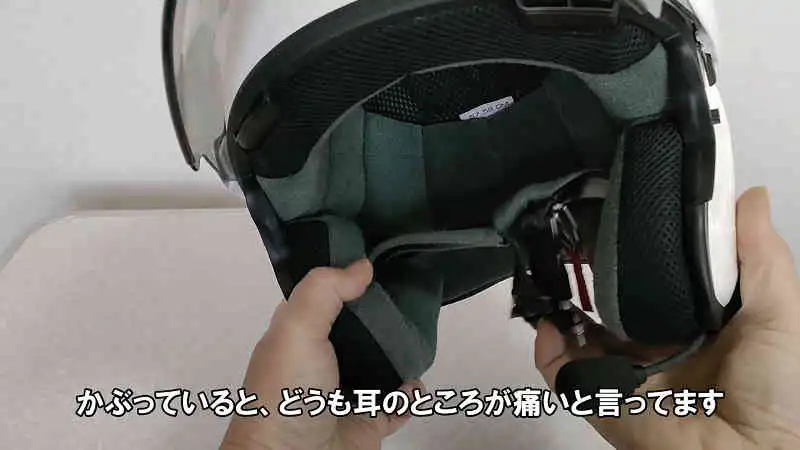
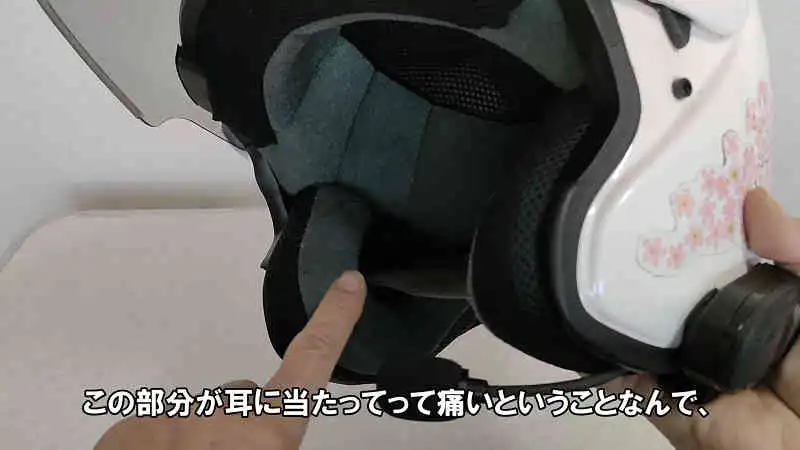
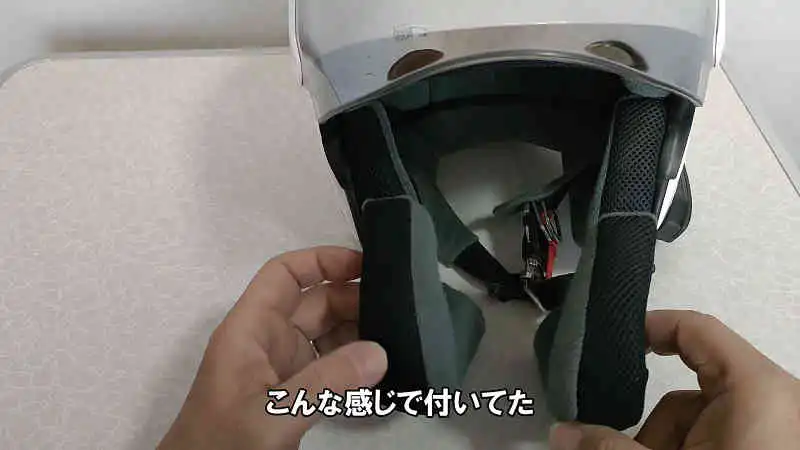
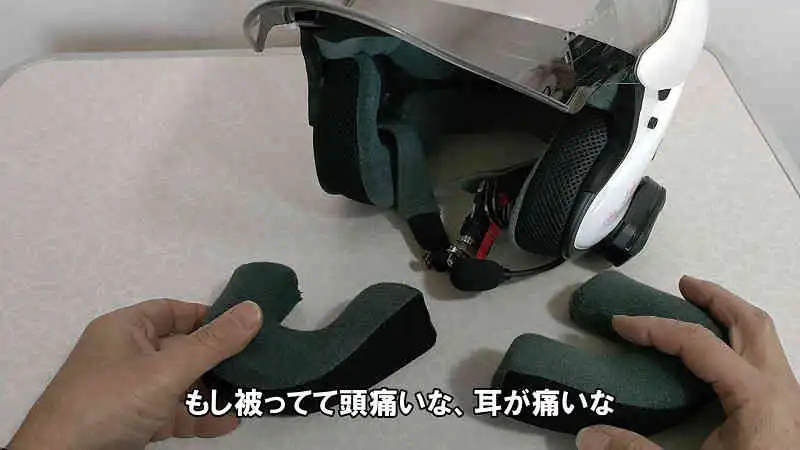
奥さんがヘルメットを被っていると耳が痛くなるというので、内装のイヤーカップ(チークパッド)を薄いタイプに交換しました。
Araiのヘルメットの交換方法を解説しています。
※動画で解説しています。
![](https://biketoshumi.chips.jp/wp-content/uploads/helmetearcup01.webp)
![](https://biketoshumi.chips.jp/wp-content/uploads/helmetearcup02.webp)
こちらの奥さんのAraiのヘルメットの内装、イヤーカップを交換します。
![](https://biketoshumi.chips.jp/wp-content/uploads/helmetearcup03.webp)
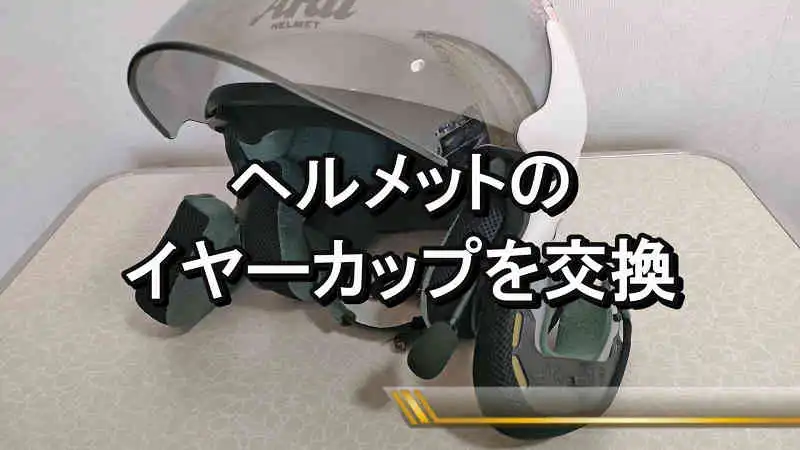
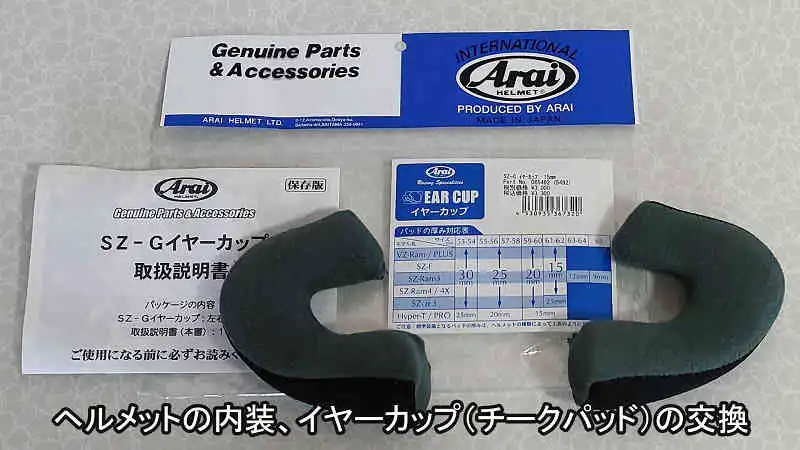
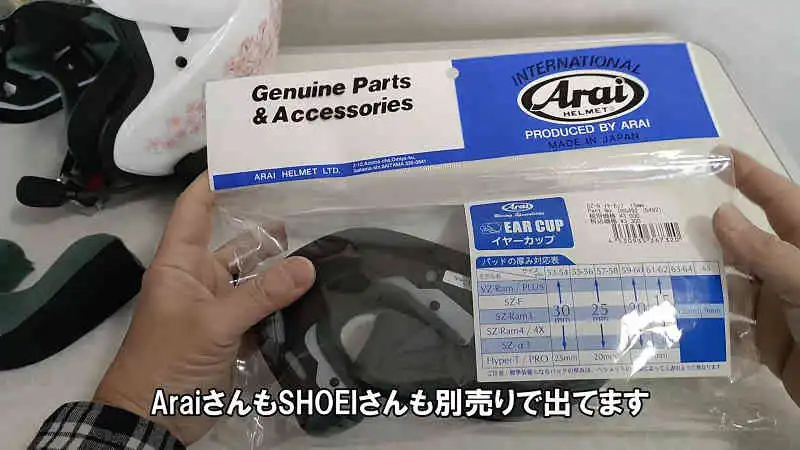
使うのはこちらのAraiのイヤーカップです。
厚みはいろいろ選べます。 緩すぎる場合は厚くすることも可能です。
![](https://biketoshumi.chips.jp/wp-content/uploads/helmetearcup04.webp)
![](https://biketoshumi.chips.jp/wp-content/uploads/helmetearcup05.webp)
![](https://biketoshumi.chips.jp/wp-content/uploads/helmetearcup06.webp)
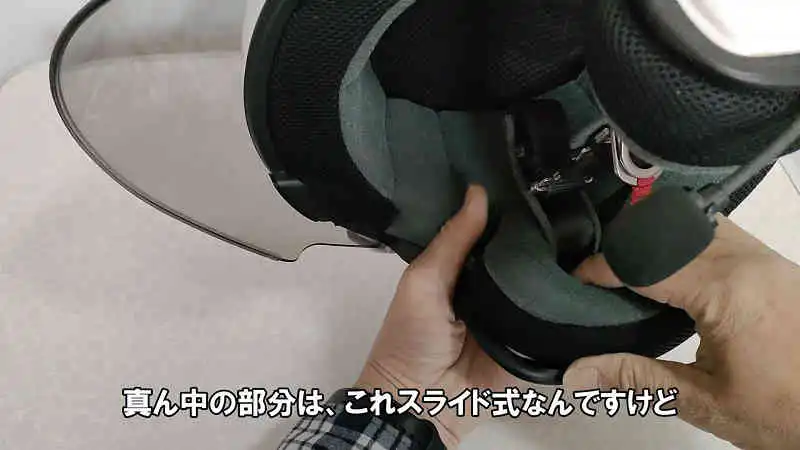
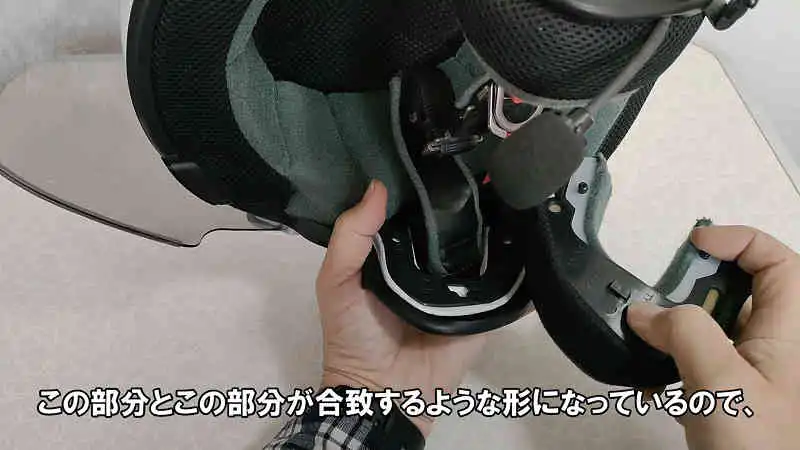
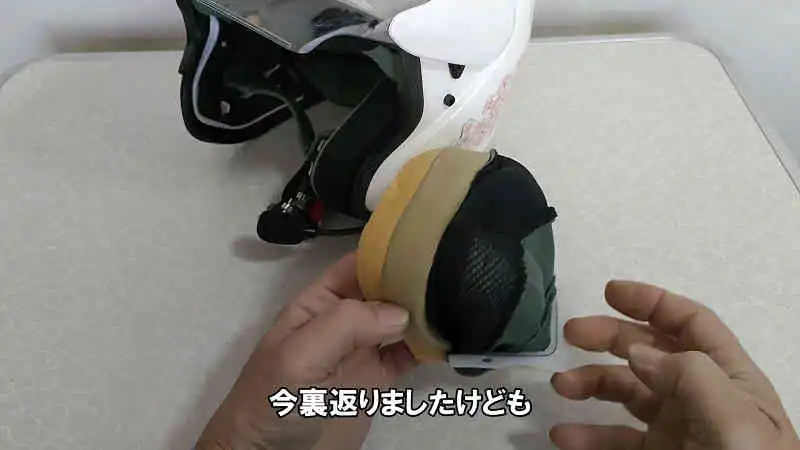
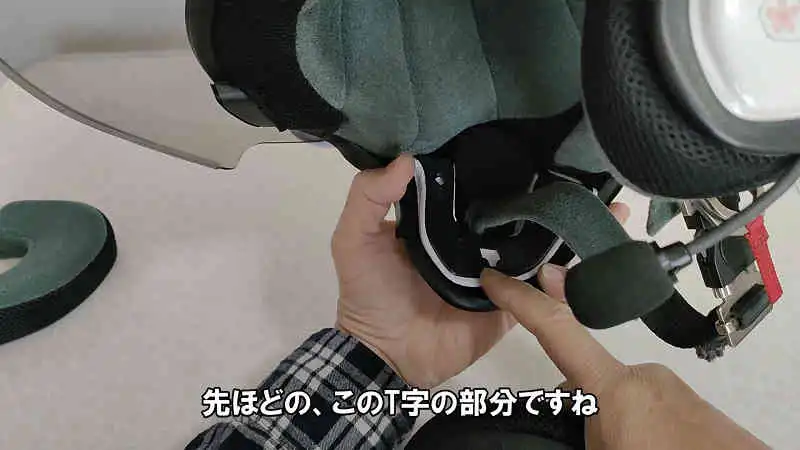
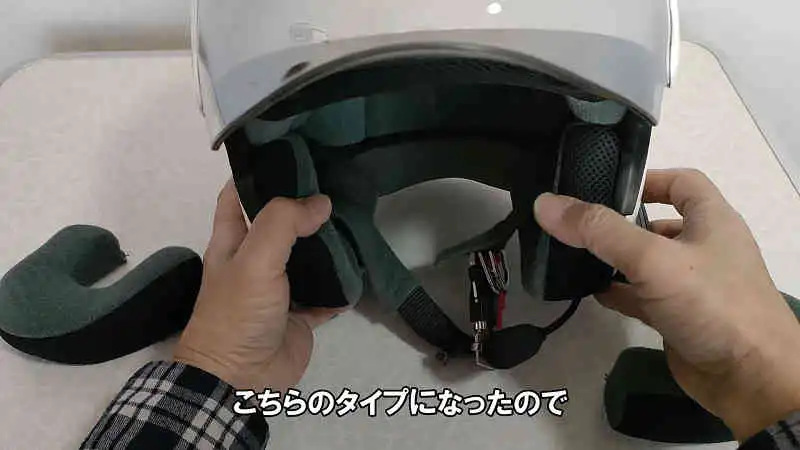
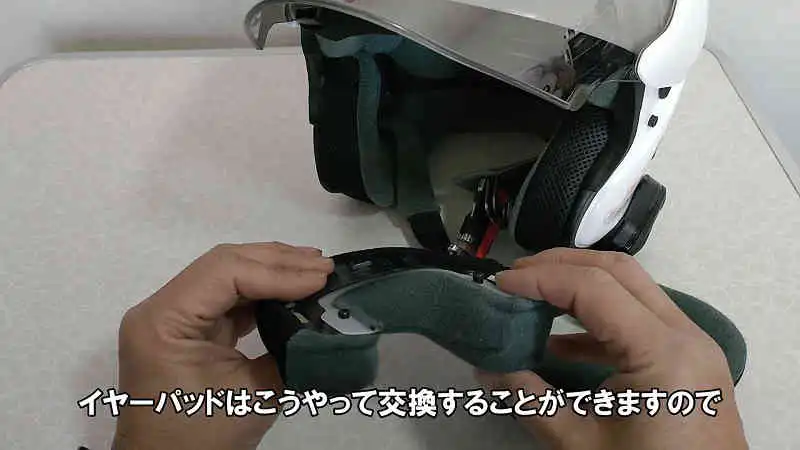
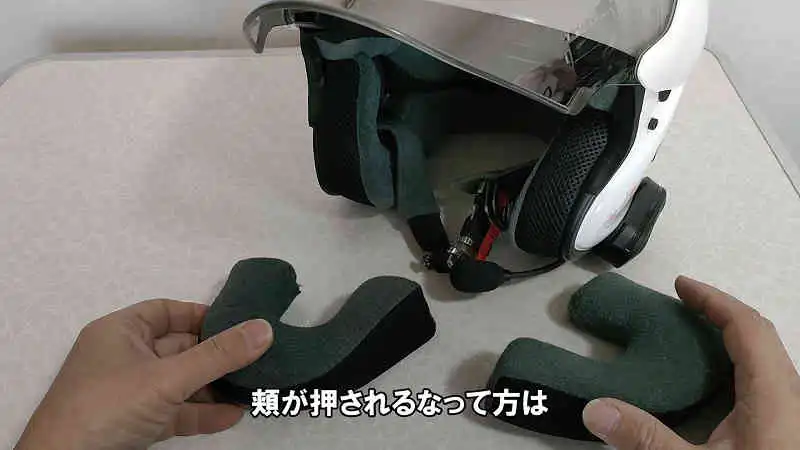
イヤーカップは3箇所のフックで留まっています。
前と後ろにピンが、真ん中はT字型フックになっています。
![](https://biketoshumi.chips.jp/wp-content/uploads/helmetearcup07.webp)
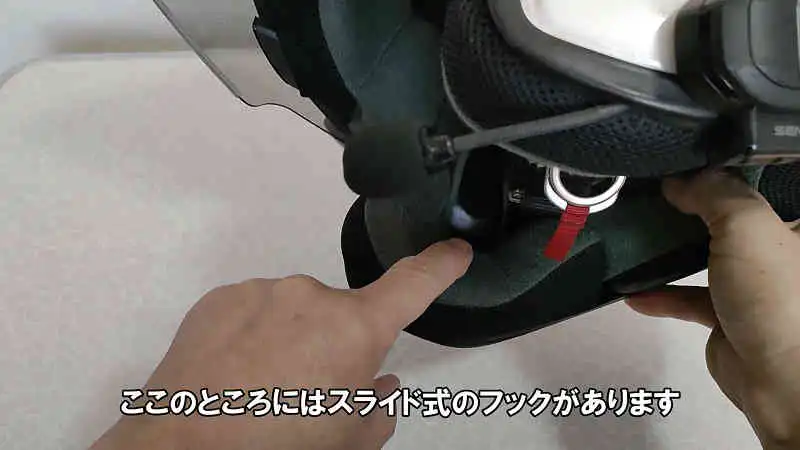
最初に前側のピンを引っ張って外します。 次に後ろのピン。
![](https://biketoshumi.chips.jp/wp-content/uploads/helmetearcup08.webp)
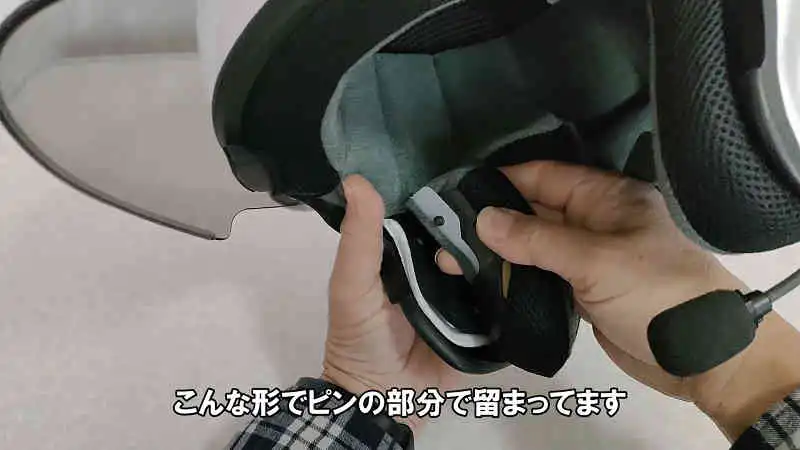
最後に真ん中部分を下にスライドさせてT字型フックを外します。
![](https://biketoshumi.chips.jp/wp-content/uploads/helmetearcup09.webp)
![](https://biketoshumi.chips.jp/wp-content/uploads/helmetearcup10.webp)
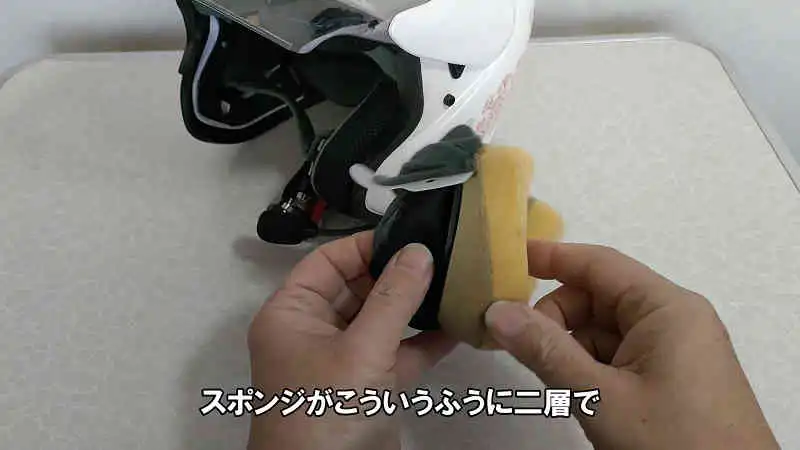
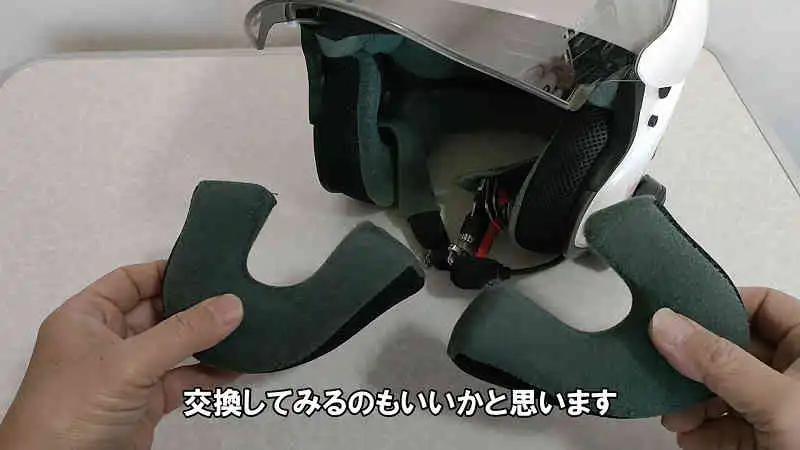
外したこのイヤーカップも加工することができるんです。
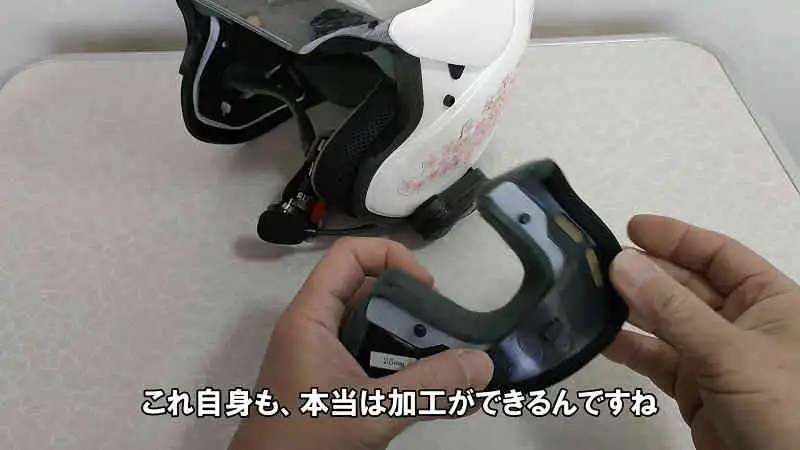
![](https://biketoshumi.chips.jp/wp-content/uploads/helmetearcup11.webp)
白いプレート引っ張り出して、
![](https://biketoshumi.chips.jp/wp-content/uploads/helmetearcup12.webp)
カバーの生地を裏返します。
![](https://biketoshumi.chips.jp/wp-content/uploads/helmetearcup13.webp)
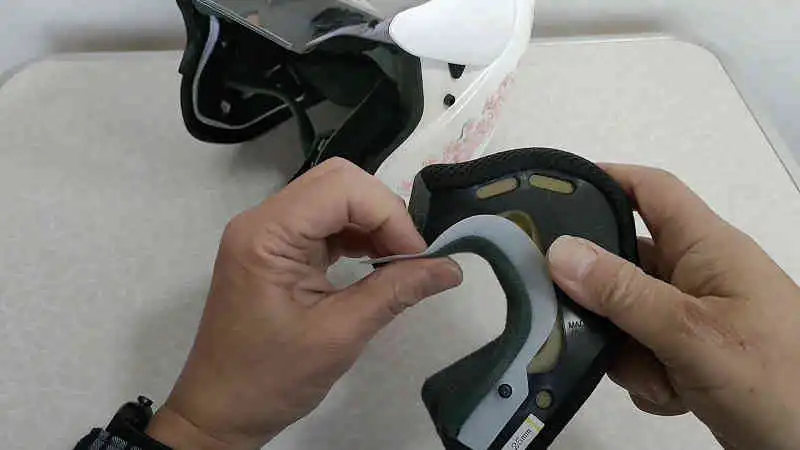
スポンジは固いのとやわらかいのと2層になっています。
![](https://biketoshumi.chips.jp/wp-content/uploads/helmetearcup14.webp)
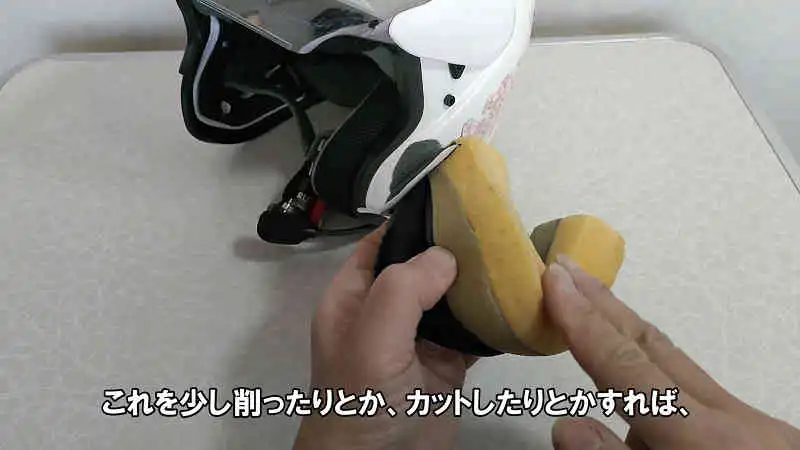
このスポンジを削ったりカットすれば薄くすることも出来ますがキレイに平らに加工するのはかなり難しそうです。
反対に厚くしたいときには、別の薄いスポンジを重ねることもできます。
![](https://biketoshumi.chips.jp/wp-content/uploads/helmetearcup15.webp)
今回はコレを加工せずに、すなおにメーカーの別売りの薄いイヤーカップに交換します。
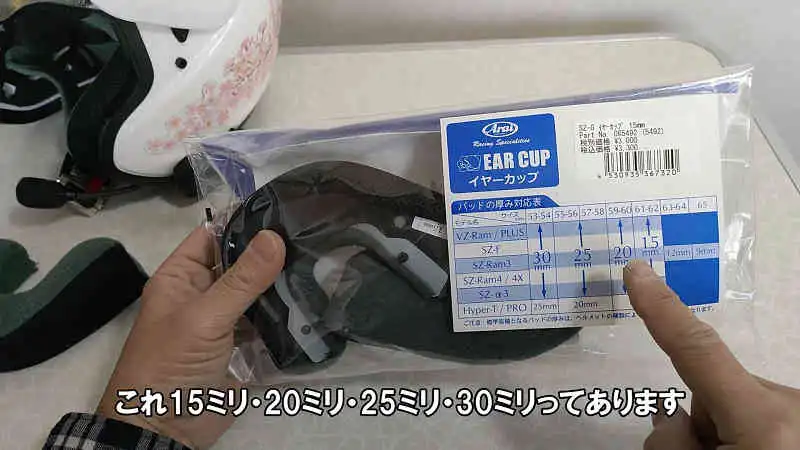
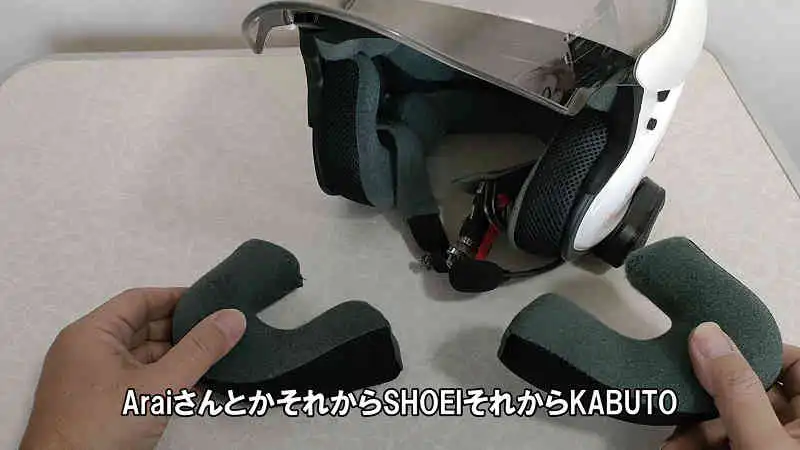
メーカー別、ヘルメットのモデル別になっていますので機種を確認して購入します。
![](https://biketoshumi.chips.jp/wp-content/uploads/helmetearcup16.webp)
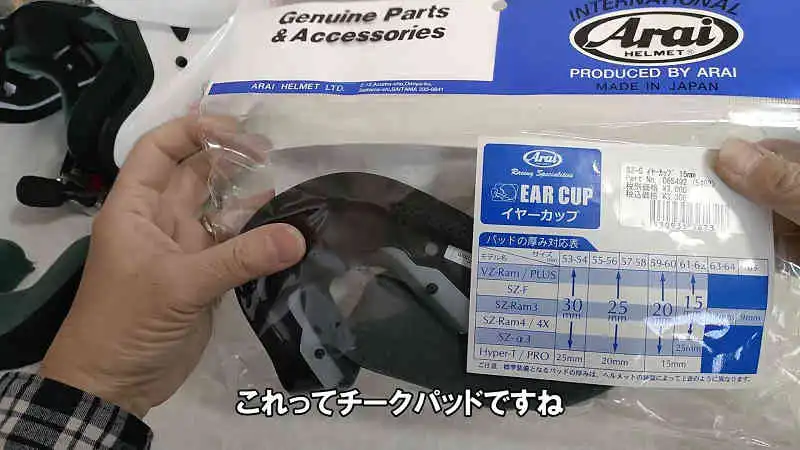
今回はAraiのヘルメット用を購入しましたが、SHOEIやKABUTOからも別売りで販売されています。
![](https://biketoshumi.chips.jp/wp-content/uploads/helmetearcup17.webp)
厚みもいろいろ選べます。
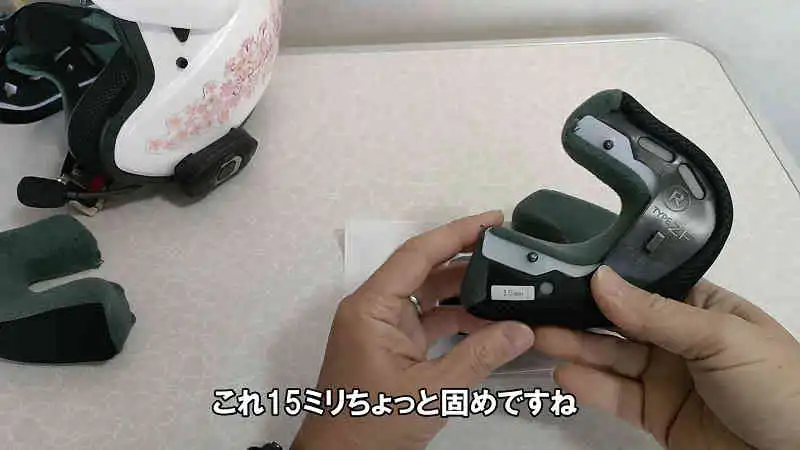
今回は耳が痛くならないように薄い15mmのものを選びました。
![](https://biketoshumi.chips.jp/wp-content/uploads/helmetearcup18.webp)
新しいイヤーカップはまだ馴染んでいないので少し固めですが、使っているうちに少しソフトになってくるでしょう。
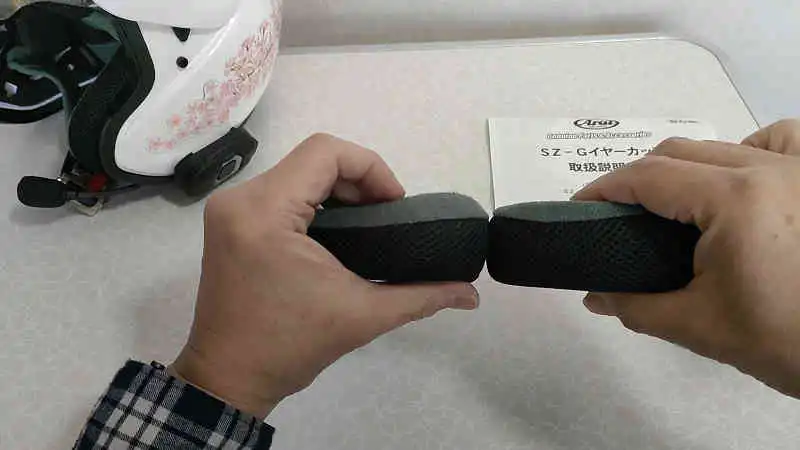
![](https://biketoshumi.chips.jp/wp-content/uploads/helmetearcup19.webp)
比べてみるとこれだけ厚さが違います。
![](https://biketoshumi.chips.jp/wp-content/uploads/helmetearcup20.webp)
わかりやすい写真入りの説明書が付属しています。
![](https://biketoshumi.chips.jp/wp-content/uploads/helmetearcup21.webp)
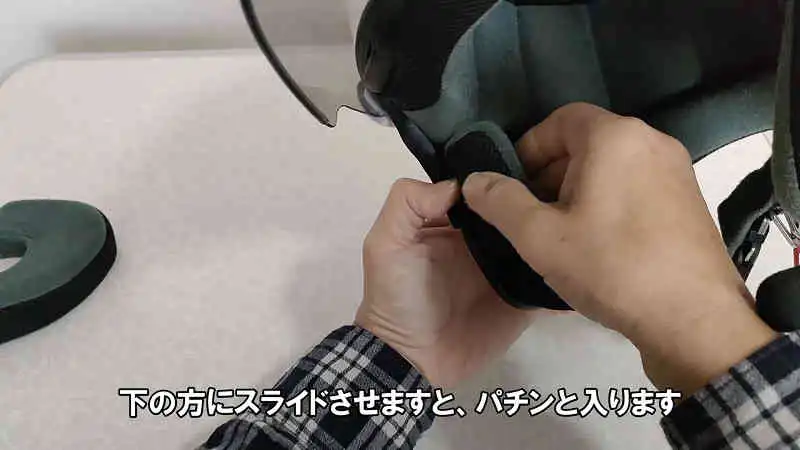
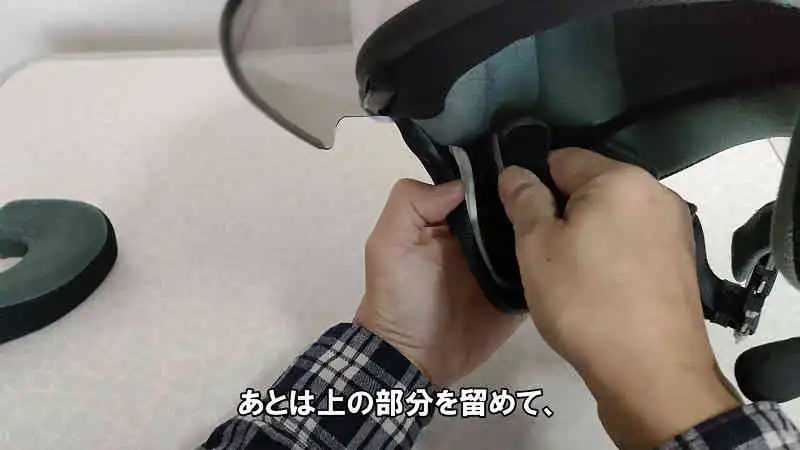
取り付けは最初に真ん中のT字フックの部分をスライドさせてはめます。
![](https://biketoshumi.chips.jp/wp-content/uploads/helmetearcup22.webp)
![](https://biketoshumi.chips.jp/wp-content/uploads/helmetearcup23.webp)
あとは前後2箇所のピンを留めて完成です。
![](https://biketoshumi.chips.jp/wp-content/uploads/helmetearcup24.webp)
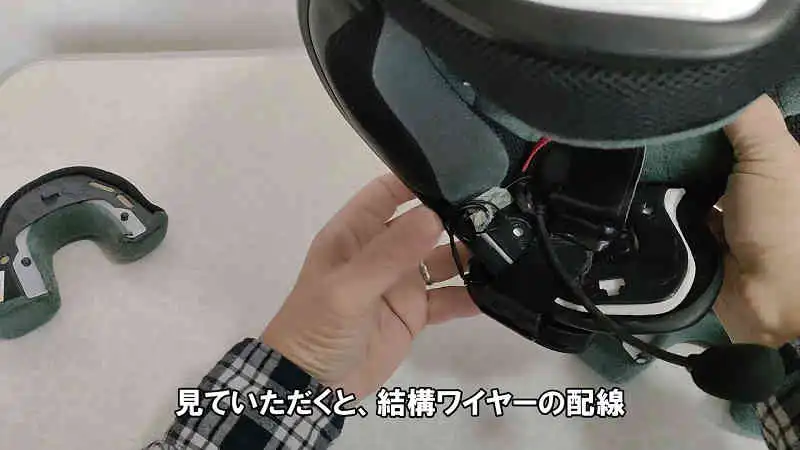
左側も同様に作業しますが、こちらにはインカムとマイクそして配線があるのでイヤーカップがなかなか留めにくいです。
![](https://biketoshumi.chips.jp/wp-content/uploads/helmetearcup25.webp)
両方とも交換できました。
![](https://biketoshumi.chips.jp/wp-content/uploads/helmetearcup26.webp)
![](https://biketoshumi.chips.jp/wp-content/uploads/helmetearcup27.webp)
実際に奥さんにかぶってもらいましたが、被ったり脱いだりが今までよりやりやすくなったと喜んでいました。
あとは実際にツーリングに行って長時間かぶってどうかですね。
![](https://biketoshumi.chips.jp/wp-content/uploads/helmetearcup28.webp)
今回はAraiヘルメットのイヤーカップの交換方法を紹介しましたが他のメーカーのヘルメットでも同様に交換することができます。
![](https://biketoshumi.chips.jp/wp-content/uploads/helmetearcup29.webp)
![](https://biketoshumi.chips.jp/wp-content/uploads/helmetearcup30.webp)
ライダーの皆さんで、被っていると耳や頬が痛いという方は一度交換してみてはいかがでしょうか。
![](https://biketoshumi.chips.jp/wp-content/uploads/helmetearcup31.webp)
![](https://biketoshumi.chips.jp/wp-content/uploads/helmetearcup32.webp)
![](https://biketoshumi.chips.jp/wp-content/uploads/helmetearcup33.webp)
コメント